Getting authorization keys
About authorization for API calls
Almost every API has a method in place to authenticate requests. You usually have to provide an API key in requests to get a response. Authorization allows API publishers to do the following:
- License access to the API
- Rate limit the number of requests
Control availability of certain features within the API, and more
Keep in mind how users authorize calls into an API — this is something you usually cover in API documentation. Later in the course we will dive into authorization methods in more detail.
In order to run the code samples in this course, you will need to use your own API keys, since these keys are usually treated like personal passwords and not given out or published openly on a web page.
Get the Mashape authorization keys
To get the authorization keys to use the Mashape API, you'll need to sign up for a Mashape account.
- On market.mashape.com, click Sign Up in the upper-right corner and create an account.
- Click Applications on the top navigation bar, and then select Default Application.
In the upper-right corner, click Get the Keys.
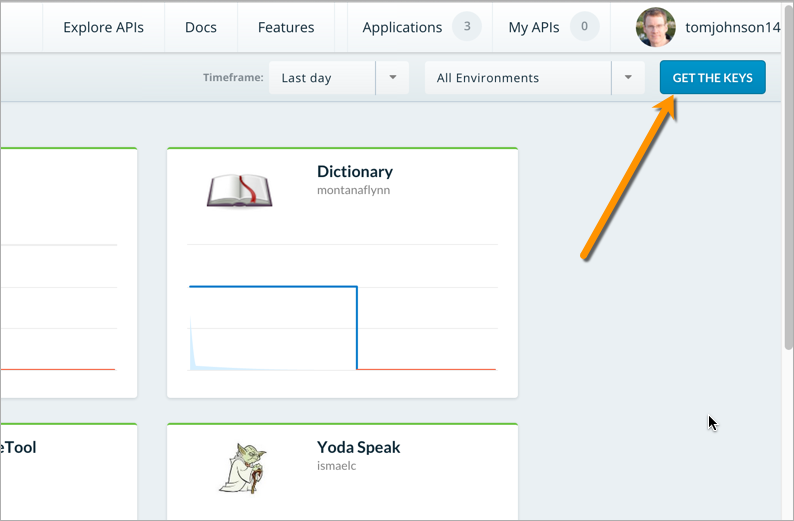
{{note}}If you don't see the Get the Keys button, make sure you click Applications > Default Application on the top navigation bar first. You may have to horizontally scroll to the right (eek!) to see the Get the Keys button.{{end}}
When the Environment Keys dialog appears, click Copy to copy the keys. (Choose the Testing keys, since this type allows you to make unlimited requests.)
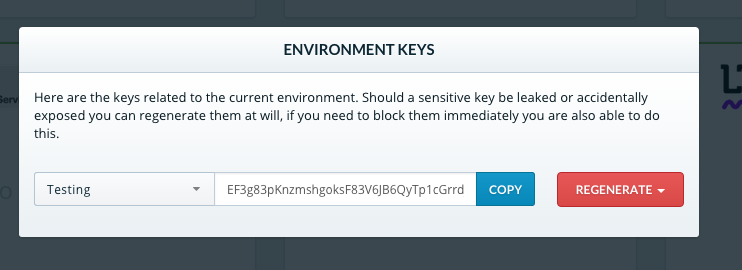
Open a text editor and paste the key so that you can easily access it later when you construct a call.
Get the Aeris Weather API secret and ID
The Aeris Weather API requires both a secret and ID to make requests.
- Go to http://www.aerisweather.com and click Sign Up in the upper-right corner.
- Select API Developer, if it's not already selected. Then click Sign Up. (Note that the free version limits the number of requests per day and per minute you can make.)
- Click Checkout. You're prompted to create an Aeris account. (Don't worry — you won't have to enter any credit card details.)
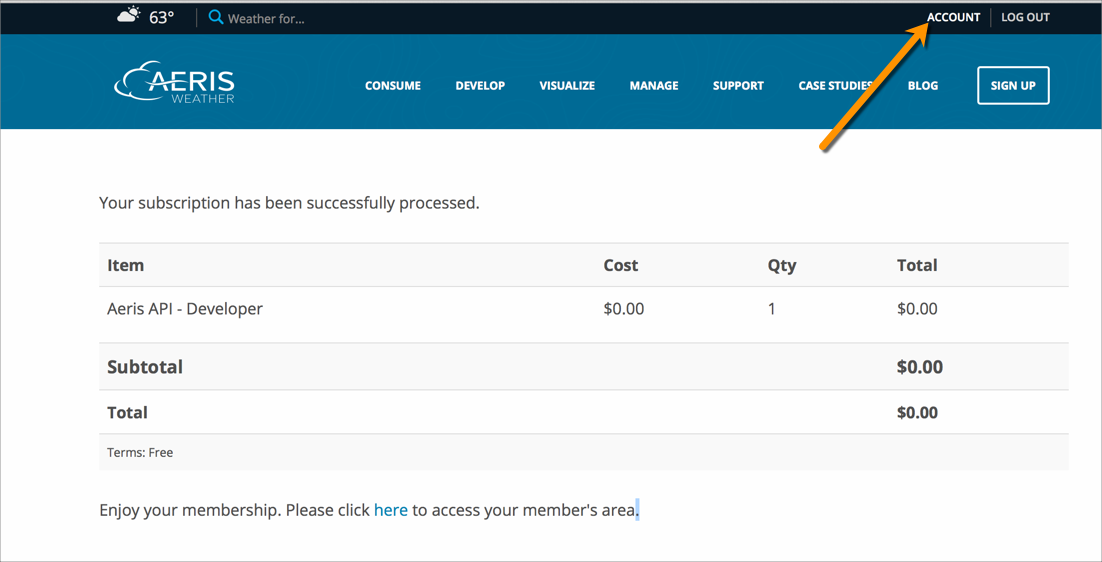
- Complete the fields and create an Aeris account. When finished creating the account, you'll see a message that says "Your subscription has been successfully processed."
Once you sign up for an account, click Account in the upper-right corner.
Click Apps (on the second navigation row, to the right of "Usage"), and then click New Application.
- In the dialog box, enter the following:
- Application Name: My biking app (or something)
- Application Namespace: localhost
- Company Name: self
- Website: local
- Click Save App.
- Refresh the web page.
Once your app registers, you should see an ID and secret for the app. Copy this information into a text file, since you'll need it to make requests.
Text editor tips
When you're working with code, you use a text editor (to work in plain text) instead of a rich text editor (which would provide a WYSIWYG interface). Many developers use different text editors. Here are a few choices:
- Sublime Text (Mac or PC)
- TextWrangler or BBedit (Mac)
- WebStorm (Mac or PC)
- Notepad++ (PC)
- Atom (Mac or Windows)
- Komodo Edit (Mac or PC)
- Coda (Mac)
These editors provide features that let you better manage the text. Choose the one you want. (Personally, I use Sublime Text when I'm working with code samples, and WebStorm when I'm working with Jekyll projects.) Avoid using TextEdit since it adds some formatting behind the scenes that can corrupt your content.