Using methods with cURL (Petstore example)
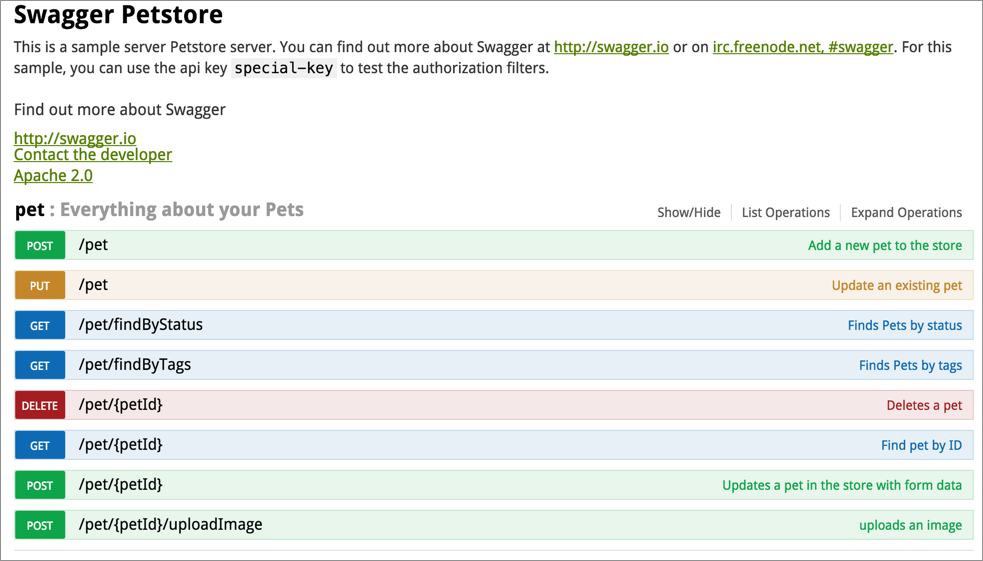
Using Petstore API
Our sample weather API from Mashape doesn't allow you to use anything but a GET method, so for this example, we'll use the petstore API from Swagger, but without actually using the Swagger UI (which is something we'll explore later). For now, we just need an API that we can create, update, and delete content from. (You're just getting familiar with cURL here.)
In this example, you'll create a new pet, update the pet, get the pet's ID, delete the pet, and then try to get the deleted pet. D
Create a new pet
To create a pet, you have to pass a JSON message in the request body. Rather than trying to encode the JSON and pass it in the URL, you'll store the JSON in a file and reference the file.
A lot of APIs require you to post requests containing JSON messages in the body. This is often how you configure a service. The list of JSON key-value pairs that the API accepts is called the "Model" in the Petstore API.
Insert the following into a file called mypet.json. This information will be passed in the
-dparameter of the cURL request:{ "id": 123, "category": { "id": 123, "name": "test" }, "name": "fluffy", "photoUrls": [ "string" ], "tags": [ { "id": 0, "name": "string" } ], "status": "available" }Change the first
idvalue to another integer (whole number) and the pet name offluffy.Use unique numbers and names that others aren't likely to also use. Also, don't begin your ID with the number 0.
Save the file in this directory:
Users/YOURUSERNAME. (Replace YOURUSERNAME with your actual user name on your computer.)In your Terminal, browse to the directory where you saved the mypet.json file. (Usually the default directory is
Users/YOURUSERNAME— hence the previous step.)If you've never browsed directories using the command line, note these essential commands:
On a Mac, find your present working directory by typing
pwd. Then move up by typing change directory:cd ../. Move down by typingcd pets, wherepetsis the name of the directory you want to move into. Typelsto list the contents of the directory.On a PC, just look at the prompt path to see your current directory. Then move up by typing
cd ../. Move down by typingcd pets, wherepetsis the name of the directory you want to move into. Typedirto list the contents of the current directory.Once your Terminal or command prompt is in the same directory as your json file, create the new pet:
curl -X POST --header "Content-Type: application/json" --header "Accept: application/json" -d @mypet.json "http://petstore.swagger.io/v2/pet"The response should look something like this:
{"id":51231236,"category":{"id":4,"name":"testexecution"},"name":"fluffernutter","photoUrls":["string"],"tags":[{"id":0,"name":"string"}],"status":"available"}Feel free to run this same request a few times more. REST APIs are "idempotent," which means that running the same request more than once won't end up duplicating the results (you just create one pet here, not multiple pets). Todd Fredrich explains idempotency by comparing it to a pregnant cow. Let's say you bring over a bull to get a cow pregnant. Even if the bull and cow mate multiple times, the result will be just one pregnancy, not a pregnancy for each mating session.
Update your pet
Guess what, your pet hates its name! Change your pet's name to something more formal using the update pet method.
- In the mypet.json file, change the pet's name.
Use the
PUTmethod instead ofPOSTwith the same cURL content to update the pet's name:curl -X PUT --header "Content-Type: application/json" --header "Accept: application/json" -d @mypet.json "http://petstore.swagger.io/v2/pet"
Get your pet's name by ID
Now you want to find your pet's name by passing the ID into the /pet/{petID} endpoint.
- In your mypet.json file, copy the first
idvalue. Use this cURL command to get information about that pet ID, replacing
51231236with your pet ID.curl -X GET --header "Accept: application/json" "http://petstore.swagger.io/v2/pet/51231236"The response contains your pet name and other information:
{"id":51231236,"category":{"id":4,"name":"test"},"name":"mr. fluffernutter","photoUrls":["string"],"tags":[{"id":0,"name":"string"}],"status":"available"}You can format the JSON by pasting it into a JSON formatting tool:
{
  "id": 51231236,
  "category": {
    "id": 4,
    "name": "test"
  },
  "name": "mr. fluffernutter",
  "photoUrls": [
    "string"
  ],
  "tags": [
    {
      "id": 0,
      "name": "string"
    }
  ],
  "status": "available"
}
Delete your pet
Unfortunately, your pet has died. It's time to delete your pet from the pet registry. <cry + tears / >
Use the DELETE method to remove your pet. Replace
5123123with your pet ID:curl -X DELETE --header "Accept: application/json" "http://petstore.swagger.io/v2/pet/5123123"Now check to make sure your pet is really removed. Use a GET request to look for your pet with that ID:
curl -X GET --header "Accept: application/json" "http://petstore.swagger.io/v2/pet/5123123"You should see this error message:
{"code":1,"type":"error","message":"Pet not found"}
This example allowed you to see how you can work with cURL to create, read, update, and delete resources. These four operations are referred to as CRUD and are common to almost every programming language.
Although Postman is probably easier to use, cURL lends itself to power-level usage. Quality assurance teams often construct advanced test scenarios that iterate through a lot of cURL requests.
Import cURL into Postman
You can import cURL commands into Postman by doing the following:
- Open a new tab in Postman and click the Import button in the upper-left corner.
Select Paste Raw Text and insert your cURL command:
curl -X GET --header "Accept: application/json" "http://petstore.swagger.io/v2/pet/5123123"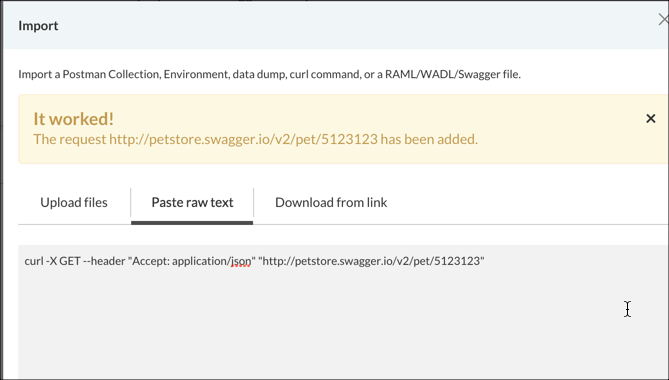
Make sure you don't have any extra spaces at the beginning.
Click Import.
- Close the dialog box.
- Click Send.
Export Postman to cURL
You can export Postman to cURL by doing the following:
In Postman, click the Generate Code button.

Select cURL from the drop-down menu.
Copy the code snippet.
curl -X GET -H "Accept: application/json" -H "Cache-Control: no-cache" -H "Postman-Token: e40c8069-21db-916e-9a94-0b9a42b39e1b" 'http://petstore.swagger.io/v2/pet/5123123'You can see that Postman adds some extra header information (
-H "Cache-Control: no-cache" -H "Postman-Token: e40c8069-21db-916e-9a94-0b9a42b39e1b") into the request. This extra header information is unnecessary and can be removed.