Static site generators
What are static site generators
Static site generators are a breed of website compilers that package up a group of files (usually written in Markdown) and make them into a website. There are more than 350 different static site generators. You can browse them at staticgen.com.
Jekyll is one of the most popular static site generators. All of my help content is on Jekyll. You can publish a fully functional tech comm website that includes content re-use, conditional filtering, variables, PDF output, and everything else you might need as a technical writer.
Here's the documentation theme that I developed for Jekyll:
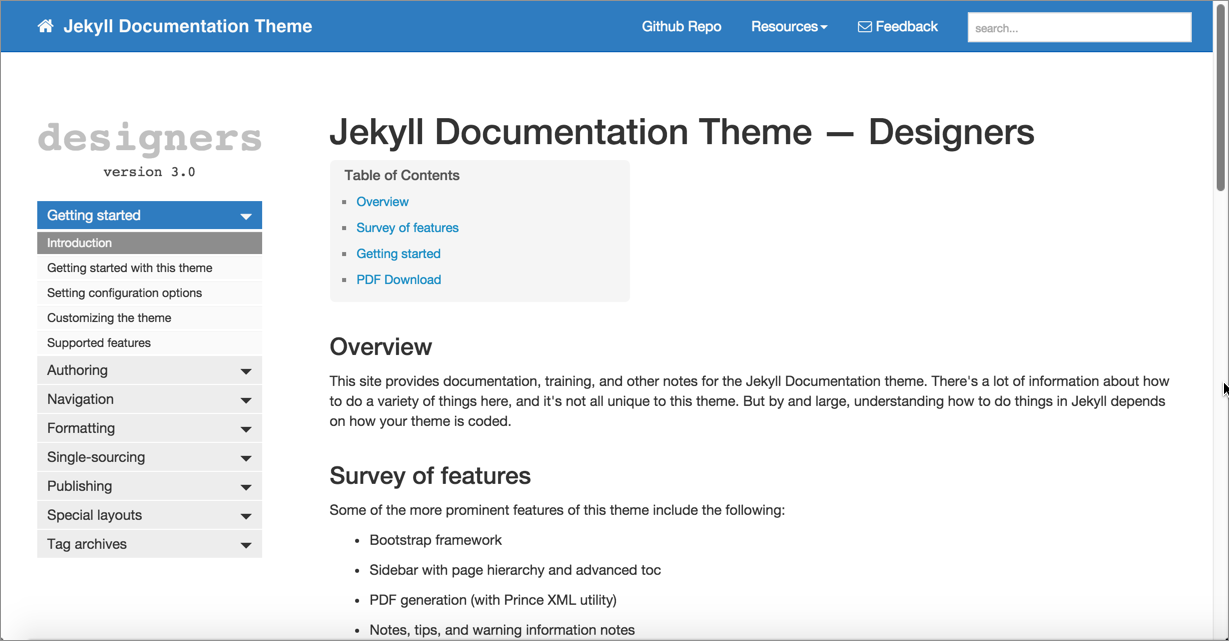
There isn't any kind of special API reference endpoint formatting here (yet), but the platform is so flexible, you can do anything with it as long as you know HTML, CSS, and JavaScript (the fundamental language of the web.
Whereas the Swagger, RAML, and API Blueprint REST specifications mainly just produce an interactive API console, with a static site generator, you have a tool for building a full-fledged website. With the website, you can include complex navigation, content re-use, translation, PDF generation, and more.
Static site generators give you a flexible web platform
Static site generators give you a lot of flexibility. They're a good choice if you need a lot of flexibility and control over your site. You're not just plugging into an existing API documentation framework or architecture. You define your own templates and structure things however you want.
With static site generators, you can do the following:
- Write in a text editor
- Create custom templates for documentation
- Use a revision control repository workflow
- Customize the look and feel of the output
- Insert JavaScript and other code directly on the page
Developing content in Jekyll
One of the questions people ask about authoring content with static site generators is how you see the output and formatting given that you're working strictly in text. For example, how do you see images, links, lists, or other formatting if you're authoring in text?
When you're authoring a Jekyll site, you open up a preview server that continuously builds your site with each change you save. I open up my text editor on the left, and the auto-generating site on the right. On a third monitor, I usually put the Terminal window so I can see when a new build is done (it takes about 10 seconds for my doc sites).
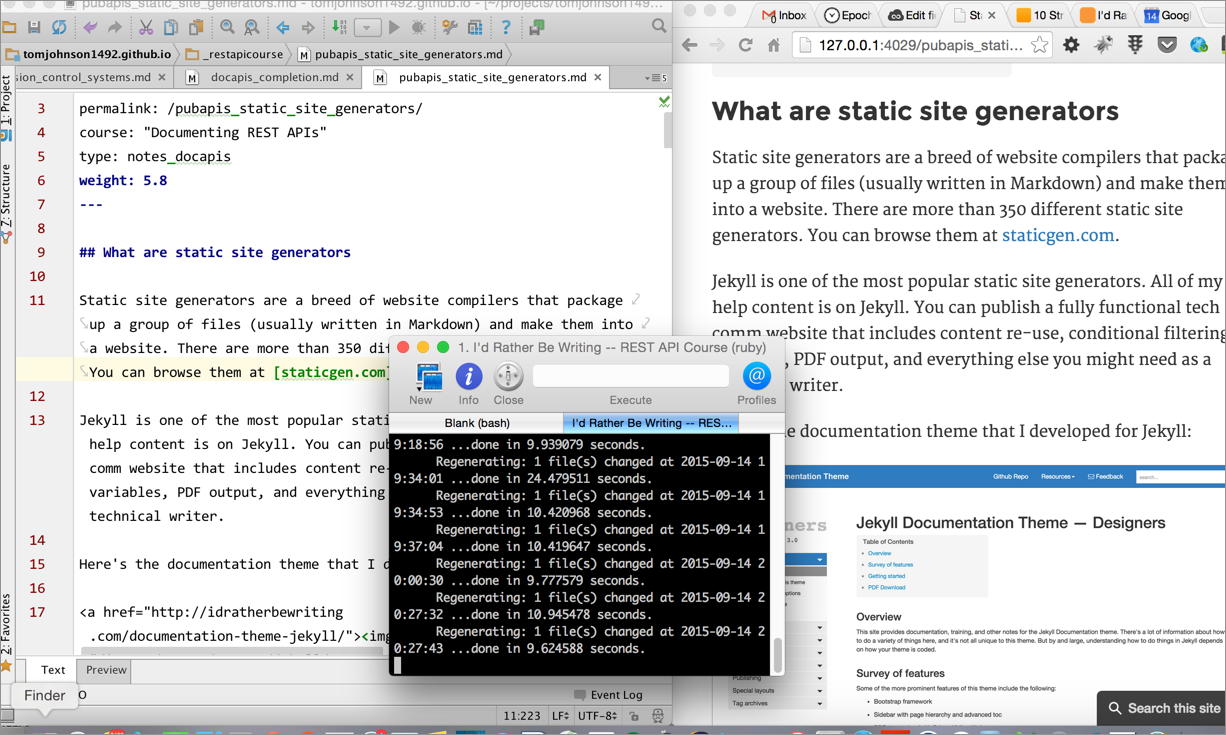
This setup works fairly well. Granted, I do have a Mac Thunderbolt 21-inch monitor, so it gives me more real estate. On a small screen, you might have to switch back and forth between screens to see the output.
Admittedly, the Markdown format is easy to use but also susceptible to error, especially if you have complicated list formatting. When you have ordered list items separated by screenshots and result statements, and sometimes the result statements have lists themselves or note formatting, it can be a bit tricky to get the display right.
But for the majority of the time, writing in Markdown is a joy. You can focus on the content without getting wrapped up in tags. If you do need complex tags, anything you can write in HTML or JavaScript you can include on your page.
Automating builds from Github
Let's do an example in publishing in CloudCannon using the Documentation Theme for Jekyll (the theme I built). You don't need to have a Windows machine to facilitate the building and publishing — you'll do that via CloudCannon and Github.
Set up your doc theme on Github
Go to the Github page for the Documentation theme for Jekyll and click Fork in the upper-right.
When you fork a project, a copy of the project (using the same name) gets added to your own Github repository. You'll see the project at
https://github.com/{your github username}/documentation-theme-jekyll.Sometimes people fork repositories to make changes and then propose pull requests of the fork to the original repo. Other times people fork repositories to create a starting point for a splinter project from the original. Github is all about social coding — one person's ending point is another person's starting point, and multiple projects can be merged into each other. You can learn more about forking here.
Sign up for a free account at CloudCannon.
- Once you sign in, click Create Site.
- While viewing your site, in the left sidebar, click Site Settings.
On the Details tab, clear the Minify and serve assets from CDN check box. Then click Update Site. Why this step? The theme you'll be connecting to uses relative link paths, which don't play nicely with the CDN caching feature in CloudCannon.
Click Storage Providers and then under Github, click Connect.
You'll be taken to Github to authorize CloudCannon's access to your Github repository.
When asked which repository to authorize, select the Documentation theme for Jekyll repository.
- Select the default write direction for changes. The default is for changes made on Github to be pushed to CloudCannon, so the arrow (which represents changes) flow from Github to CloudCannon. That's the direction you want.
- Wait about 5 minutes for the files from your Github repository to sync over to CloudCannon. In the left sidebar, click File Browser. If you see a bunch of files with a green check mark, it means the files have synced over from the Github repo.
View your CloudCannon site at the preview URL in the upper-left corner.
It should look just like the Documentation theme for Jekyll here.
Make an update to your Github repo
Remember your Github files are syncing from Github to CloudCannon. Let's see that workflow in action.
In your browser, go to your Github repository that you forked and make a change.
For example, browse to the index.md file, click the Edit button (pencil icon), make an update, and then commit the update.
Wait a minute or so, and look for the change at the preview URL to your site on CloudCannon (refresh the page). The change should be reflected.
You've now got a workflow that involves Github as the storage provider syncing to a Jekyll theme hosted on CloudCannon.
What's cool about CloudCannon and Jekyll
Jekyll is a good solution because it provides near infinite flexibility and fits well within the UX web stack.
CloudCannon provides an easy way to allow subject matter experts to author and edit content, since CloudCanonn allows you to create editable regions within your Jekyll theme. This would allow a tools team to maintain the site while providing areas for less technical people to author content.
However, CloudCannon wouldn't be a good solution if your docs require authentication in a highly secure environment. Additionally, Jekyll only provide static HTML files. If you want users to log in, and then personalize what they see when logged in, Jekyll won't provide this experience.
Publish the surfreport in the Aviator Jekyll theme using CloudCannon's interface
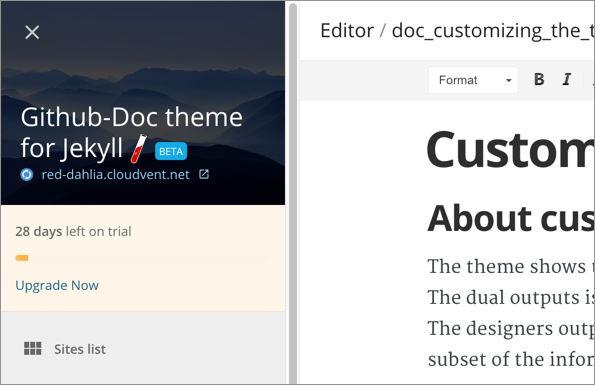
Let's say you want to use a theme that provides ready-made templates for REST API documentation. In this activity, you'll publish the weatherdata endpoints in a Jekyll theme called Aviator. Additionally, rather than syncing the files from a Github repository, you'll just work with the files directly in CloudCannon.
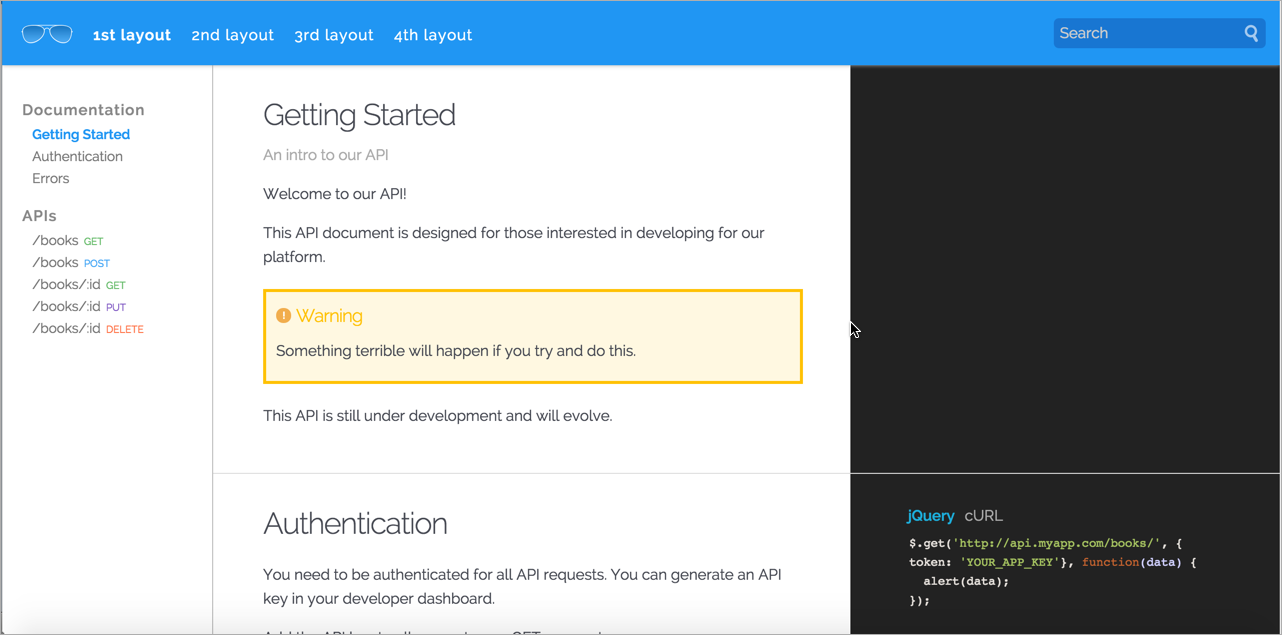
The Aviator API documentation theme by Cloud Cannon is designed for REST APIs. You'll use this theme to input a new endpoint. If you're continuing on from the previous course (Documenting REST APIs), you already have a new endpoint called surfreport.
If you're on a Mac (with Rubygems and Jekyll installed), building Jekyll sites is a lot simpler. But even if you're on Windows, it won't matter for this tutorial. You'll be using CloudCannon, a SaaS website builder product, to build the Jekyll files.
a. Download the Jekyll Aviator theme
Go to Aviator API documentation theme and click the Download ZIP button.

Unzip the files.
b. Add the weatherdata endpoint doc to the theme
Browse to the theme's files. In the _api folder, open 1_1_books_list.md in a text editor and look at the format.
In every Jekyll file, there's some "frontmatter" at the top. The frontmatter section has three dashes before and after it.
The frontmatter is formatted in a syntax called YML. YML is similar to JSON but uses spaces and hyphens instead of curly braces. This makes it more human readable.
Create a new file called 1-6_weatherdata.md and save it in the same _api folder.
- Get the data from the weatherdata endpoint from this Weather API on Mashape. Put the data from this endpoint into the Aviator theme's template.
The Aviator Jekyll theme has a specific layout that will be applied to all the files inside the _api folder (these files are called a collection). Jekyll will access these values by going to api.title, api.type, and so forth. It will then push this content into the template (which you can see by going to _layouts/multi.md).
Here's what my 1-6_weatherdata.md file looks like. Be sure to put the response within square brackets, indented with one tab (4 spaces). You can also download the file here. Remove the raw and endraw tags at the beginning and end of the code sample (which I had to add to keep Jekyll from trying to process it).
---
title: /weatherdata
type: get
description: Get weather forecast by Latitude and Longitude.
parameters:
  title: Weatherdata parameters
  data:
    - lat:
      - string
      - Required. Latitude.
    - lng:
      - string
      - Required. Longitude.
right_code:
  return: |
    [
    {
    "query": {
    "count": 1,
    "created": "2014-05-03T03:57:53Z",
    "lang": "en-US",
    "results": {
      "channel": {
        "title": "Yahoo! Weather - Tebrau, MY",
        "link": "http://us.rd.yahoo.com/dailynews/rss/weather/Tebrau__MY/*http://weather.yahoo.com/forecast/MYXX0004_c.html",
        "description": "Yahoo! Weather for Tebrau, MY",
        "language": "en-us",
        "lastBuildDate": "Sat, 03 May 2014 11:00 am MYT",
        "ttl": "60",
        "location": {
          "city": "Tebrau",
          "country": "Malaysia",
          "region": ""
        },
        "units": {
          "distance": "km",
          "pressure": "mb",
          "speed": "km/h",
          "temperature": "C"
        },
        "wind": {
          "chill": "32",
          "direction": "170",
          "speed": "4.83"
        },
        "atmosphere": {
          "humidity": "66",
          "pressure": "982.05",
          "rising": "0",
          "visibility": "9.99"
        },
        "astronomy": {
          "sunrise": "6:57 am",
          "sunset": "7:06 pm"
        },
        "image": {
          "title": "Yahoo! Weather",
          "width": "142",
          "height": "18",
          "link": "http://weather.yahoo.com",
          "url": "http://l.yimg.com/a/i/brand/purplelogo//uh/us/news-wea.gif"
        },
        "item": {
          "title": "Conditions for Tebrau, MY at 11:00 am MYT",
          "lat": "1.58",
          "long": "103.74",
          "link": "http://us.rd.yahoo.com/dailynews/rss/weather/Tebrau__MY/*http://weather.yahoo.com/forecast/MYXX0004_c.html",
          "pubDate": "Sat, 03 May 2014 11:00 am MYT",
          "condition": {
            "code": "28",
            "date": "Sat, 03 May 2014 11:00 am MYT",
            "temp": "32",
            "text": "Mostly Cloudy"
          },
          "description": "\n<img src=\"http://l.yimg.com/a/i/us/we/52/28.gif\"/><br />\n<b>Current Conditions:</b><br />\nMostly Cloudy, 32 C<BR />\n<BR /><b>Forecast:</b><BR />\nSat - Scattered Thunderstorms. High: 32 Low: 26<br />\nSun - Thunderstorms. High: 33 Low: 27<br />\nMon - Scattered Thunderstorms. High: 32 Low: 26<br />\nTue - Thunderstorms. High: 32 Low: 26<br />\nWed - Scattered Thunderstorms. High: 32 Low: 27<br />\n<br />\n<a href=\"http://us.rd.yahoo.com/dailynews/rss/weather/Tebrau__MY/*http://weather.yahoo.com/forecast/MYXX0004_c.html\">Full Forecast at Yahoo! Weather</a><BR/><BR/>\n(provided by <a href=\"http://www.weather.com\" >The Weather Channel</a>)<br/>\n",
          "forecast": [
            {
              "code": "38",
              "date": "3 May 2014",
              "day": "Sat",
              "high": "32",
              "low": "26",
              "text": "Scattered Thunderstorms"
            },
            {
              "code": "4",
              "date": "4 May 2014",
              "day": "Sun",
              "high": "33",
              "low": "27",
              "text": "Thunderstorms"
            },
            {
              "code": "38",
              "date": "5 May 2014",
              "day": "Mon",
              "high": "32",
              "low": "26",
              "text": "Scattered Thunderstorms"
            },
            {
              "code": "4",
              "date": "6 May 2014",
              "day": "Tue",
              "high": "32",
              "low": "26",
              "text": "Thunderstorms"
            },
            {
              "code": "38",
              "date": "7 May 2014",
              "day": "Wed",
              "high": "32",
              "low": "27",
              "text": "Scattered Thunderstorms"
            }
          ],
          "guid": {
            "isPermaLink": "false",
            "content": "MYXX0004_2014_05_07_7_00_MYT"
          }
        }
      }
    }
    }
    }
    ]
---

<div class="code-viewer">

<pre data-language="cURL">
curl --get --include 'https://simple-weather.p.mashape.com/weatherdata?lat=1.0&lng=1.0' \
  -H 'X-Mashape-Key: EF3g83pKnzmshgoksF83V6JB6QyTp1cGrrdjsnczTkkYgYrp8p' \
  -H 'Accept: application/json'
  </pre>

</div>
c. Publish your Jekyll project on CloudCannon
- Go to http://cloudcannon.com and, if you don't already have an account, sign up for a free test account by clicking Sign Up
- After signing up and logging in, click Create Site.
- Log in and click Create Site.
- Type a name for the site (e.g., Aviator Test) and press your Enter key.
Click the Upload Files button in the upper-right corner.
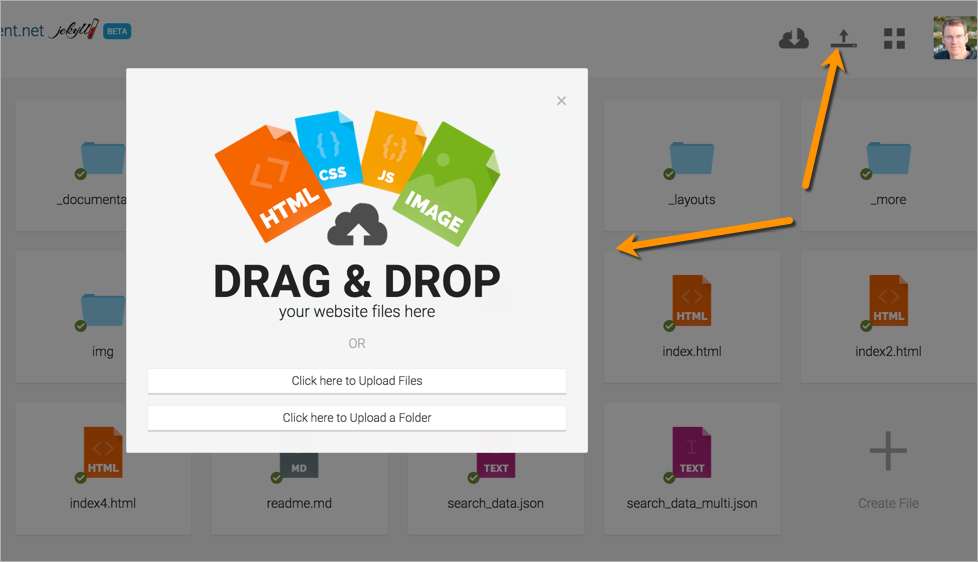
Open your Aviator theme files, select them all, and drag them into the upload file dialog box. (Don't just drag the Aviator theme folder into CloudCannon).
After the files finish uploading (and little green check marks appear next to the files), click the preview link in the upper-left corner:
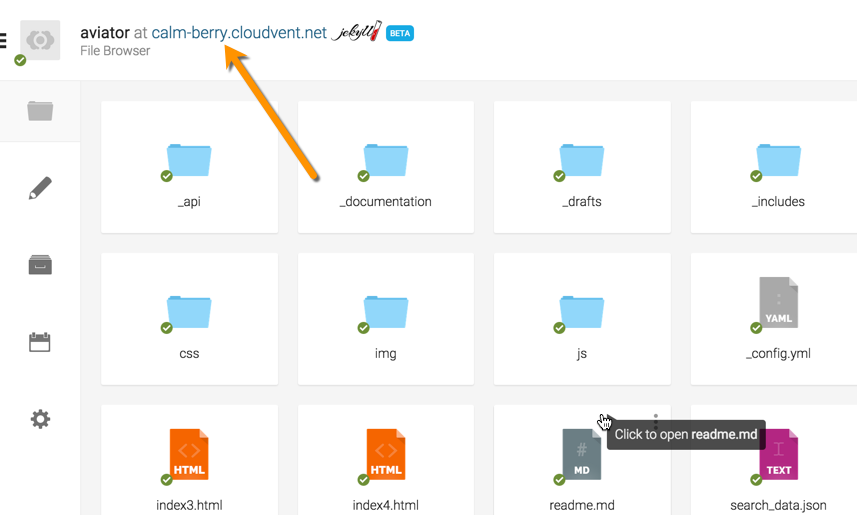
When prompted for a password for viewing the site to add, add one.
- Click the preview link to view the site.
The site should appear as follows:

You can see my site at http://delightful-nightingale.cloudvent.net/. The password is stcsummit.
If your endpoint doesn't appear, you probably have invalid YML syntax. Make sure the left edge of the response is at least one tab (4 spaces) in.
Each time you save the site, CloudCannon actually rebuilds the Jekyll files into the site that you see.
If you switch between the code editor and visual display, the code sample gets mangled. (The CloudCannon editor will convert the https path into a link.) This is a bug in CloudCannon that will be fixed.
Doc Websites Using Jekyll
Here are some websites using Jekyll: