Pull request workflows through Github in the browser
Managing reviews through Github
In the previous step, you used Github Desktop to manage the workflow of committing files and creating requests. In this tutorial, you'll do a similar thing but using the browser-based interface that Github provides rather than using a terminal or Github Desktop.
When you ask developers to review content, ask the specific developer who created the feature you're documenting. Developer tasks are usually specific. One developer may not understand what another developer is really doing (beyond a superficial level).
Make edits in a separate branch
By default, your new repository has one branch called "Master." Usually when you're making changes or reviews/edits, you create a new branch and make all the changes in the branch. Then when finished, the repo owner merges edits from the branch into the master through a "pull request."
Although you can perform these operations using Git commands from your terminal, you can also perform the actions through the browser interface. This might be helpful if you have less technical people making edits to your content.
To make edits in a separate branch:
Pretend you're a SME reviewer. Go to the Github repo and create a new branch by selecting the branch drop-down menu and typing a new branch name, such as "sme review."
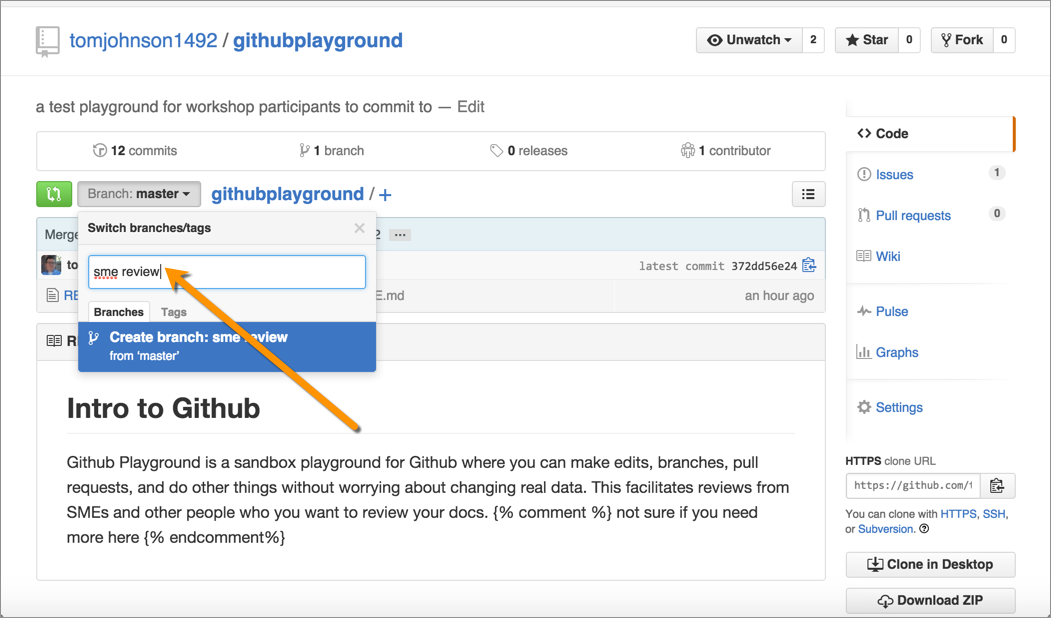
When you create a new branch, the content from the master is copied over into the new branch. The branch is like doing a "Save as" with an existing document.
Click the README.txt file, and then click the Edit this file button (pencil icon) to edit the file.
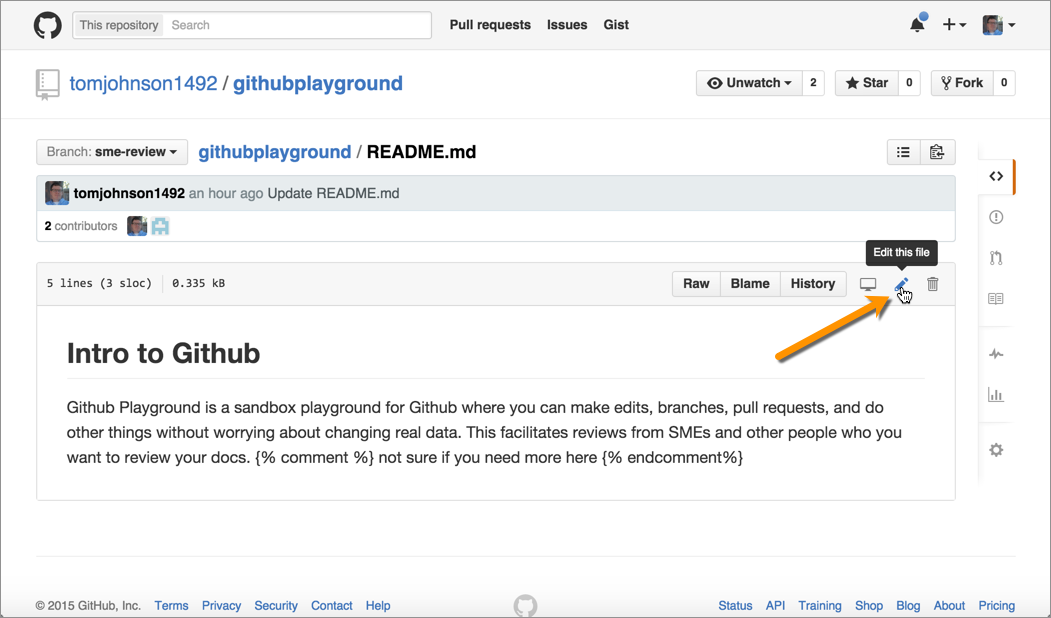
Make some changes to the content, and then scroll down and click Commit Changes. Explain the reason for the changes and commit the changes to your sme review branch, and then click Commit Changes.
Reviewers could continue making edits this way until they have finished reviewing all of the documentation. All of the changes are made on a branch, not the master.
Create a pull request
Now that the review process is complete, it's time to merge the branch into the master. You merge the branch into the master through a pull request. Any "collaborator" on the team with write access can initiate and complete the pull request. You can add collaborators through Settings.
To create a pull request:
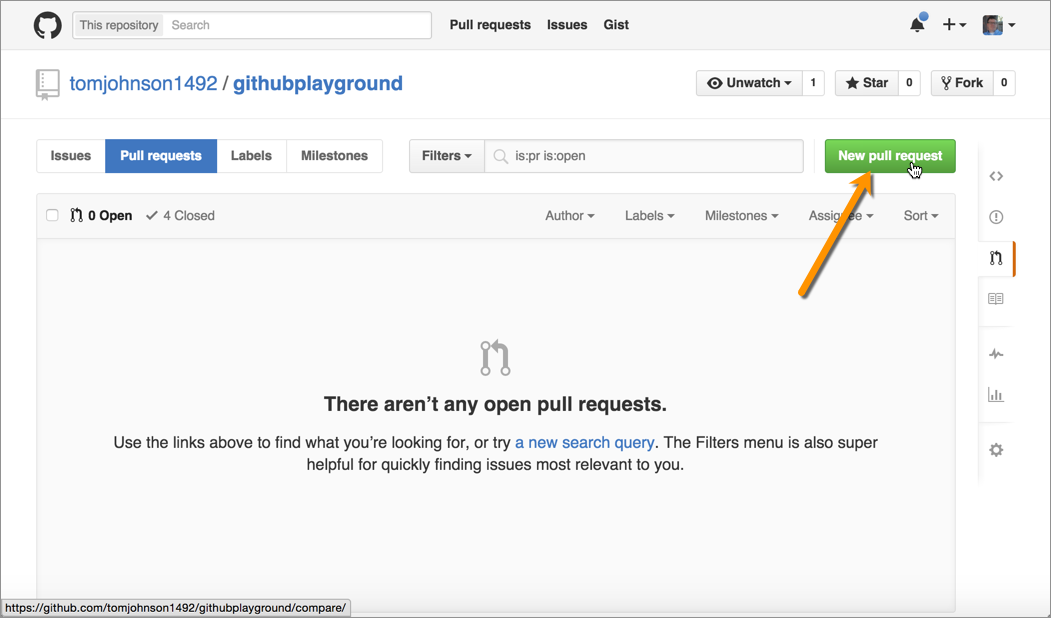
- View the repository and click the Pull requests button on the right.
Click the New pull request button.
Select the branch ("sme review") that you want to compare against the master.
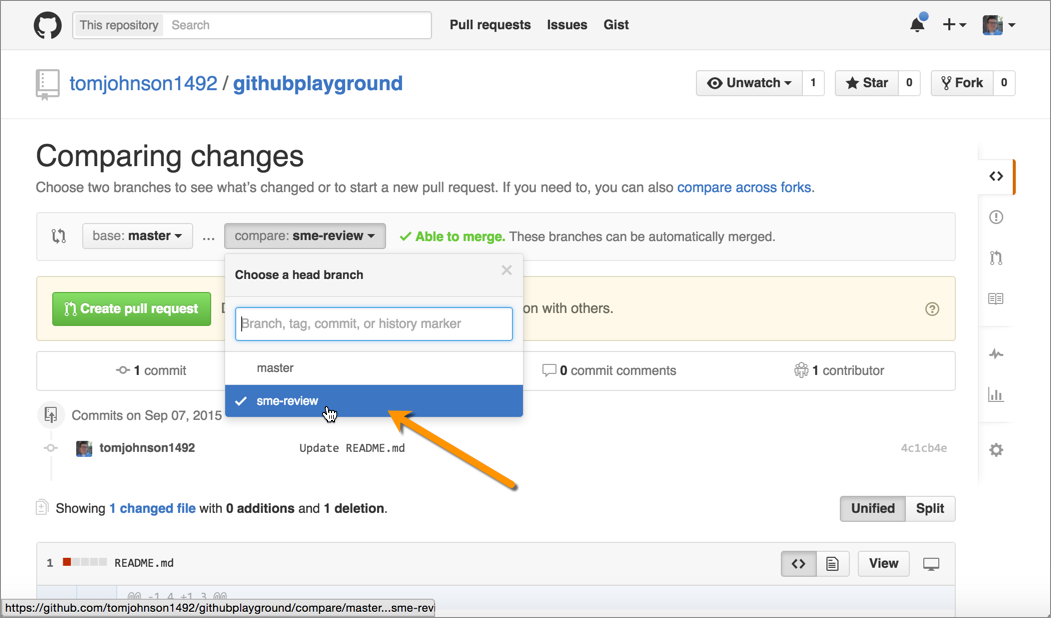
When you compare the branch against the master, you can see a list of all the changes. You can view the changes through two viewing modes: Unified or Split. Unified shows the edits together in the same content area, whereas split shows the two files side by side.
Click Create pull request.
- Describe the pull request, and then click Create pull request.
Process the pull request
Now pretend you are the project owner, and you see that you received a new pull request. You want to process the pull request and merge the sme review branch into the master.
- Click the Pull requests button to see the pending pull requests.
Click the pull request and view the changes by clicking the Files changed tab.
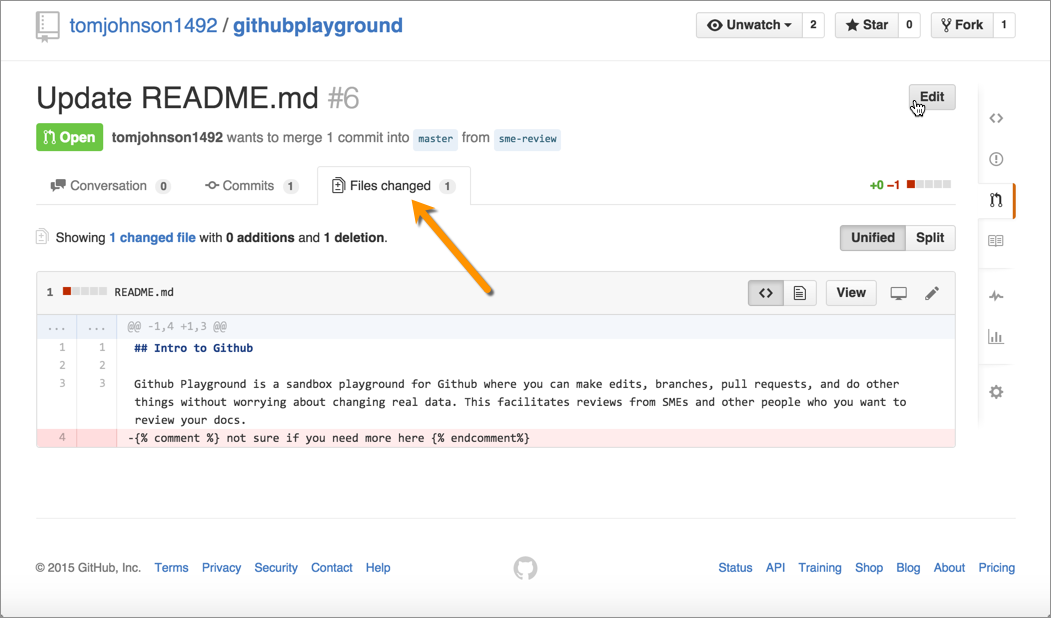
{{note}}If you only want to implement some of the edits, go into the sme review branch and make the updates before processing the pull request. The pull request doesn't give you a line-by-line option about which changes you want to accept or reject (like in Microsoft Word's Track Changes). Merging pull requests is an all-or-nothing process.{{end}}
Note also that if the pull request is made against an older version of the master, such that the master's original content no longer exists or has moved elsewhere, the merges will be more difficult to make.
Click the Conversation tab, and then click the Merge pull request button.
Click Confirm merge.
The sme review branch gets merged into the master. Now the master and the sme review branch are the same.
Click the Delete branch button to delete the sme review branch.
If you don't want to delete the branch here, you can always remove old branches by clicking the branches link while viewing your Github repository, and then click the Delete (trash can) button next to the branch.
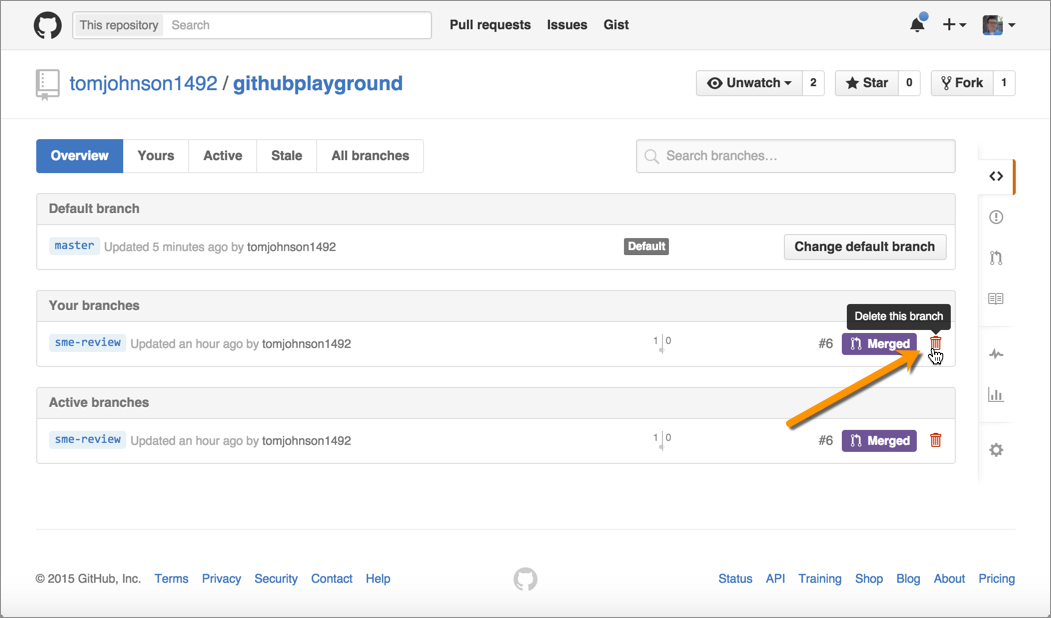
If you look at your list of branches, you'll see that the deleted branch no longer appears.
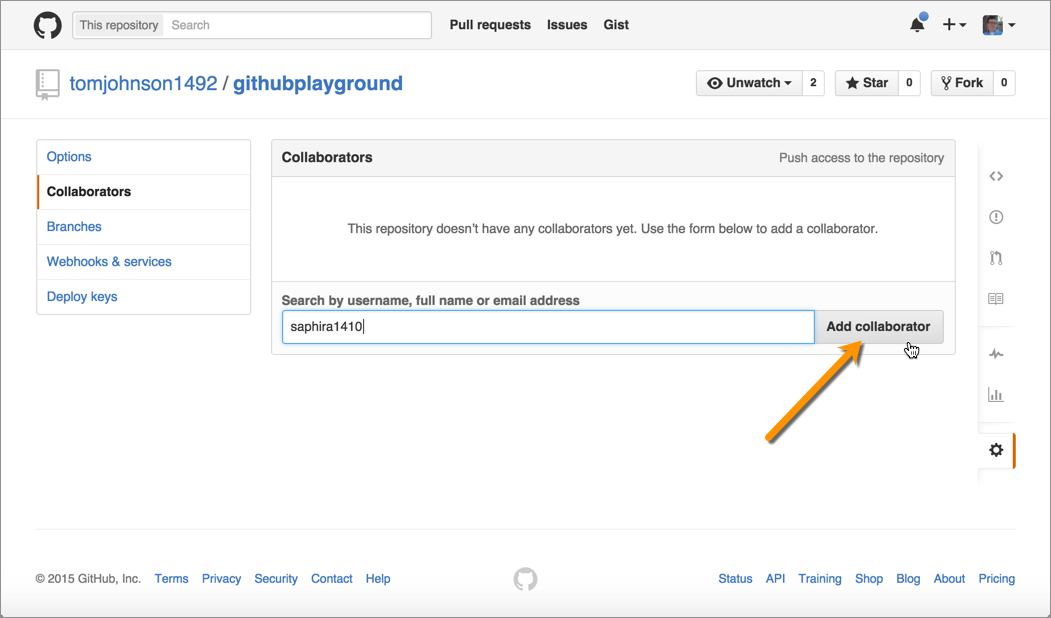
Add collaborators to your project
You need to add collaborators to your Github project so they can commit edits to a branch. If someone isn't a collaborator and they want to make edits, they will receive an error.
If people don't have write access, they can fork the project instead of making edits on a branch on the same project. Forking a project clones the entire repository, though, rather than creating a branch within the same repository. You can merge a forked repository, but this scenario probably is less common for technical writers working with developers on the same projects.
To add collaborators to your Github project:
- While viewing your Github repository, click the Settings button (gear icon) on the lower-right.
- Click the Collaborators tab on the left.
- Type the Github usernames of those you want to have access in the Collaborator area.
Click Add Collaborator.