Version control systems
About version control systems
Pretty much every IT shop uses some form of version control with their software code. Version control is how developers collaborate and manage their work.
If you're working in API documentation, you'll most likely need to plug into your developer's version control system to get code. Or you may be creating branches and adding or editing documentation there.
Many developers are extremely familiar with version control, but typically these systems aren't used much by technical writers because technical writers have traditionally worked with binary file formats, such as Microsoft Word and Adobe Framemaker. Binary file formats are readable only by computers, and version control systems do a poor job in managing binary files because you can't easily see changes from one version to the next.
If you're working in a text file format, you can integrate your doc authoring and workflow into a version control system. If you do, a whole new world will open up to you.
Different types of version control systems
There are different types of version control systems. A centralized version control system requires everyone to check out or synchronize files with a central repository when editing them. This setup isn't so common anymore, since working with files on a central server tends to be slow.
More commonly, software shops use distributed version control systems. The most common systems are probably Git and Mercurial. Largely due to the fact that Github provides repositories for free on the web, Git is the most common version control repository for web and open source projects, so we'll be focusing on it more. However, these two systems share the same concepts and workflows.

Note that Github provides online repositories and tools for Git. However, Git and Github aren't the same.
The idea of version control
When you install version control software such as Git and initialize a repository in a folder, an invisible folder gets added to the repository. This invisible folder handles the versioning of the content in that folder.
When you add files to Git and commit them, Git takes a snapshot of that file at that point in time. When you commit another change, Git creates another snapshot. If you decide to revert to an earlier version of the file, you just revert to the particular snapshot. This is the basic idea of versioning content.
Basic workflow with version control
There are many excellent tutorials on version control on the web, so I'll defer to those tutorials for more details. In short, Git provides several stages for your files. Here's the general workflow:
- You must first add any files that you want Git to track. Just because the files are in the initialized Git repository doesn't mean that Git is actually tracking and versioning their changes. Only when you officially "add" files to your Git project does Git start tracking changes to that file.
- Any modified files that Git is tracking are said to be in a "staging" area.
- When you "commit" your files, Git creates a snapshot of the file at that point in time. You can always revert to this snapshot.
- After you commit your changes, you can "push" your changes to the master. Once you push your changes to the master, your own working copy and the master branch are back in sync.
Branching
Git's default repository is the "master" branch. When collaborating with others on the same project, usually people branch the master, make edits in the branch, and then merge the branch back into the master.
If you're editing doc annotations in code files, you'll probably follow this same workflow — making edits in a special doc branch. When you're done, you'll create a pull request to have developers merge the doc branch back into the master.
GUI version control clients
Although most developers use the command line when working with version control systems, there are many GUI clients available that may simplify the whole process. GUI clients might be especially helpful when you're trying to see what has changed in a file, since the GUI can better highlight and indicate the changes taking place.
You can also see changes in a text file format, but the >>>>> and <<<<< tags aren't always that intuitive.
Follow a typical workflow with a Github project using Github Desktop
In this tutorial, you'll use Github Desktop to manage the workflow. First download and install Github Desktop. You'll also need a Github account.
- Go to Github.com and create a new repository from the the Repositories tab.
View your repository, and then click the Clone in Desktop button.
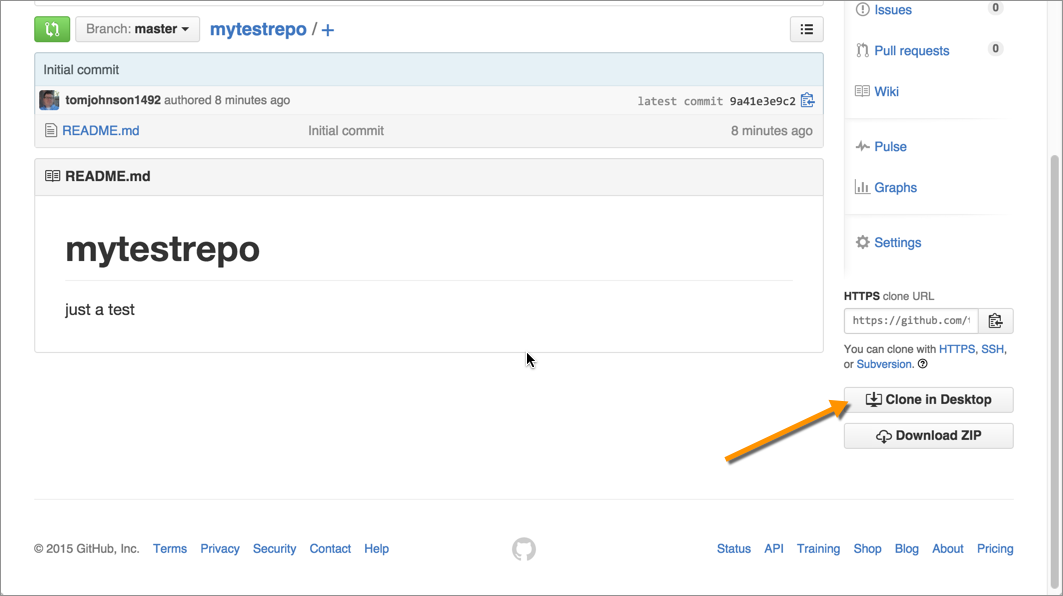
Select the folder where you want to clone the repository (such as under your username), and then click Clone.
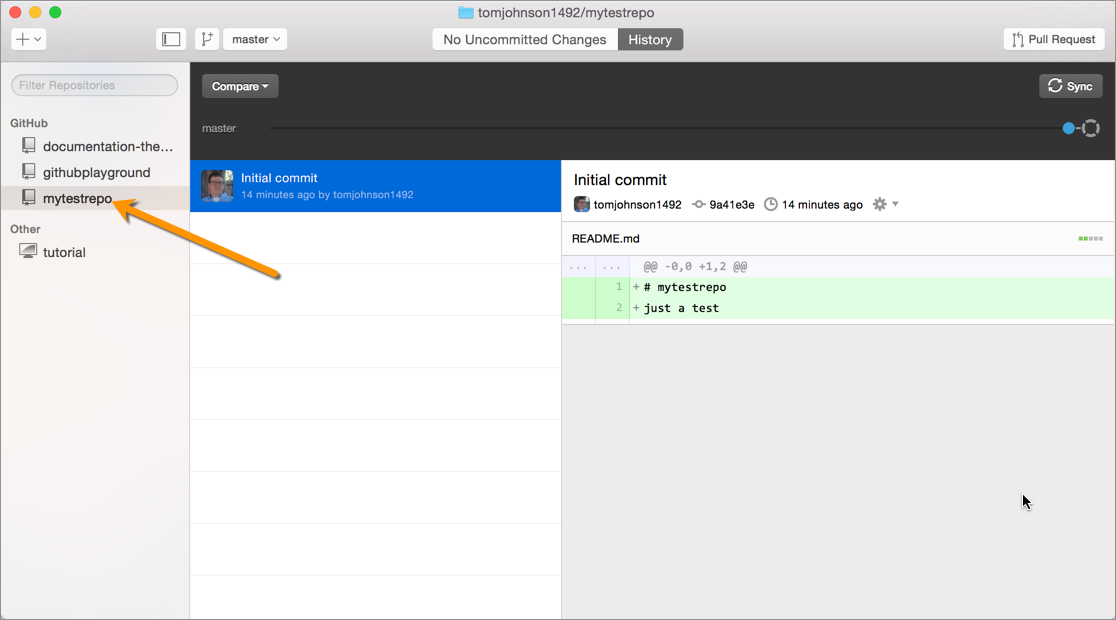
Github Desktop should launch (you'll need to allow the application to launch, most likely) and add the newly created repository.
Go into the repository (using your Finder or browsing folders normally) and add a simple text file with some content.
Go back to Github Desktop and click the Uncommitted Changes link at the top.
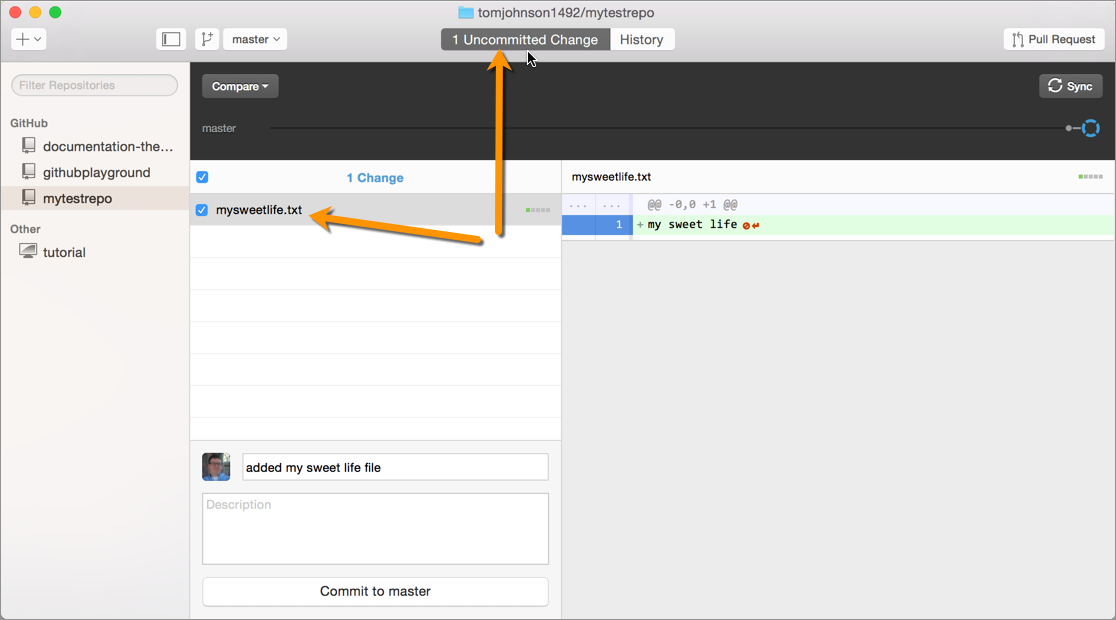
You'll see the new file you added in the list of uncommitted changes.
Type a commit message.
- Click Commit to Master.
- Click the History tab at the top. You can see the most recent commit there. If you view your repository online, you'll see that the change you made has been pushed to the master.
Create a branch
Now let's create a branch, make some changes, and then merge the branch into the master.
Click the Add a branch button and create a new branch. Call it something like "tom-edits," but use your own name.
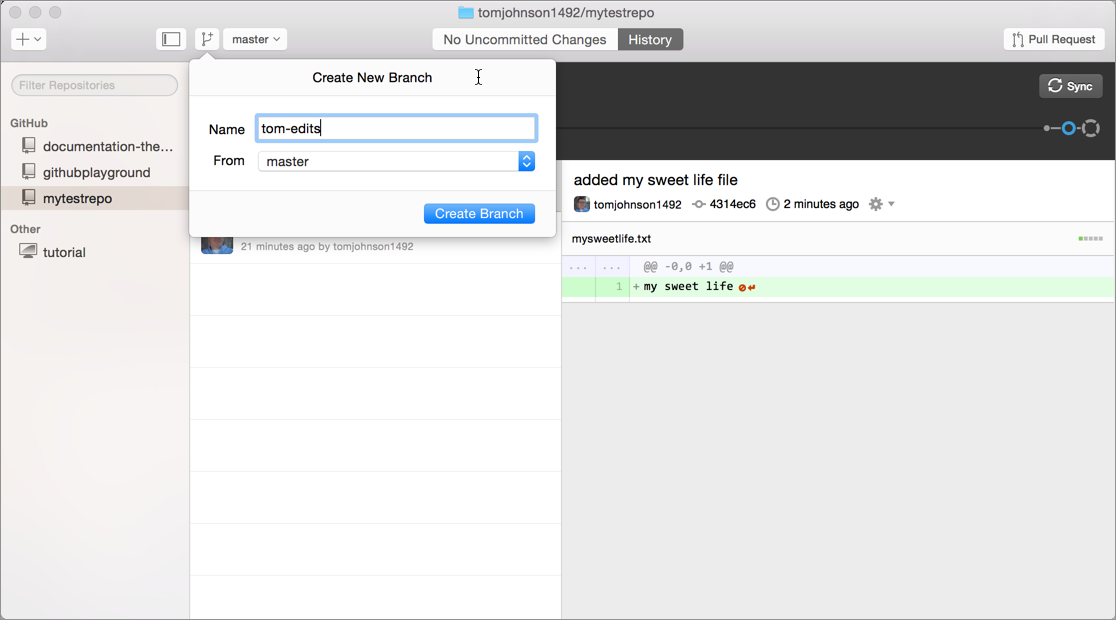
When you create the branch, you'll see the branch drop-down menu indicate that you're working in that branch. A branch is a copy of the master that exists on a separate line. You can see that the visual line in Github Desktop branches off to the side when you create a branch.
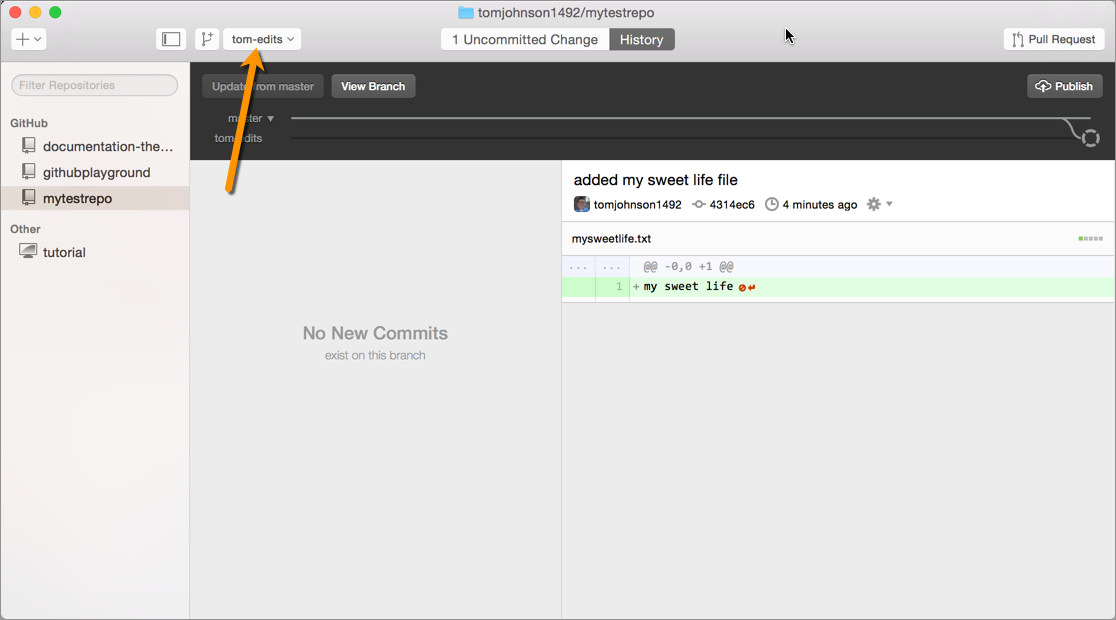
Browse to the file you created earlier and make a change to it, such as adding a new line with some text.
Return to Github Desktop and notice that on the Uncommitted Changes tab, you have new modified files.
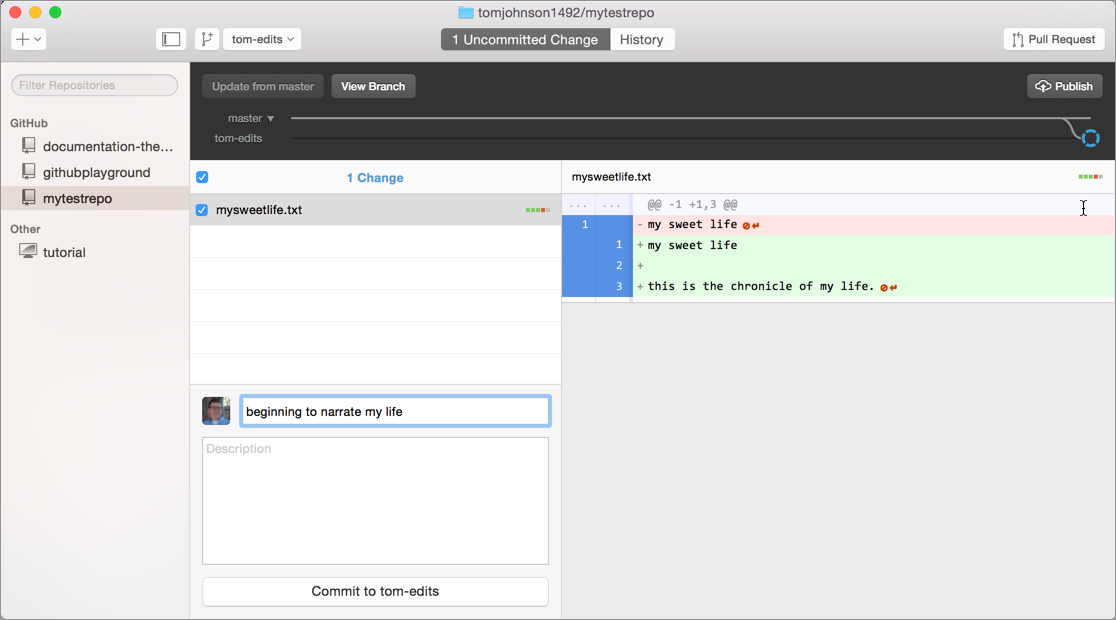
The right pane shows the deleted lines in red and new lines in green. This helps you see what changed.
However, if you switch to the master branch, you won't see the modified files. That's because you're working in a branch, and so your changes are associated with that branch. Switching this branch option in Github Desktop changes the working directory of your Github project to the branch.
Switch back to your tom-edits branch.
Merge the branch through a pull request
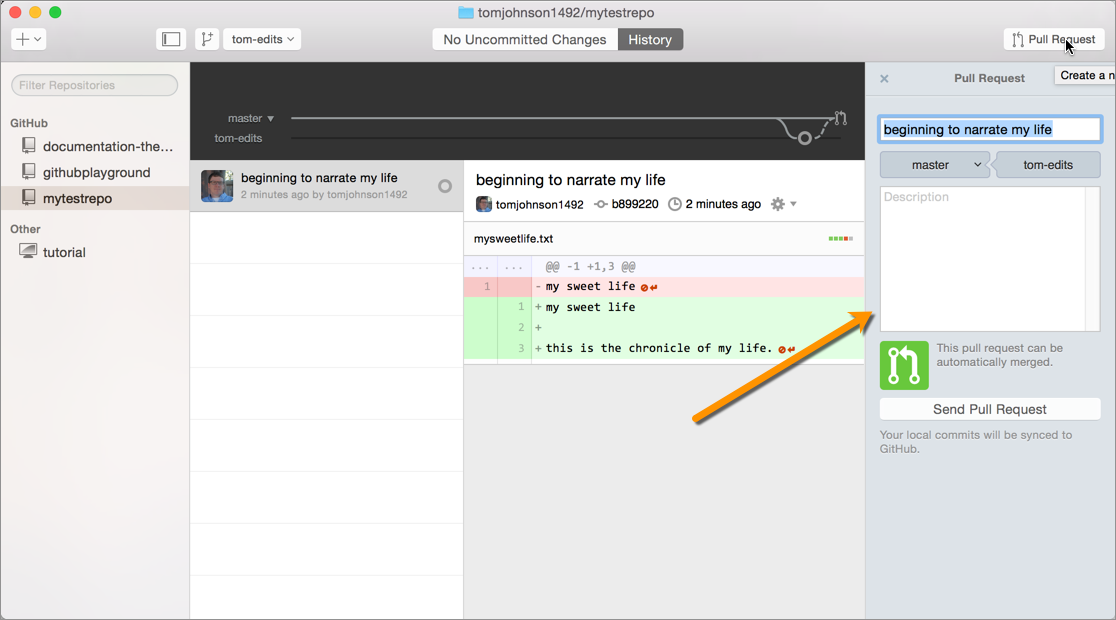
Now let's merge the tom-edits branch into the master. Click the Pull Request button in the upper-right corner.
You're shown that you're merging the tom-edits branch into the master.
Describe the pull request, and then click Send Pull Request.
Go to the link shown to evaluate the pull request online. In the browser interface, you can click the Files changes tab to see what files have changed in tom-edit that you are merging into the master.
Click Merge Pull Request.
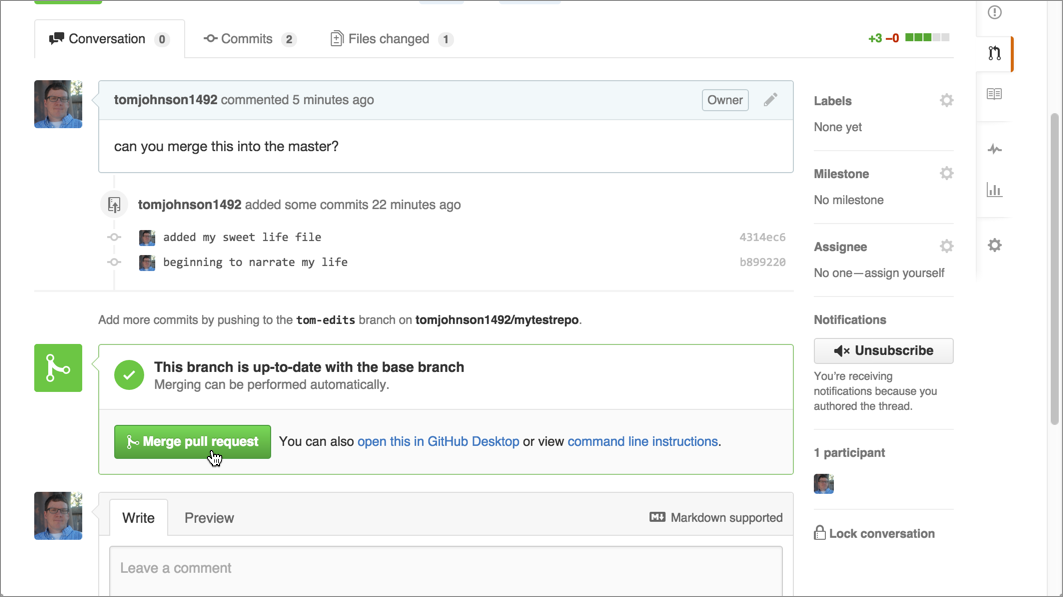
The branch gets merged into the master. You can delete the tom-edits branch now if you want.
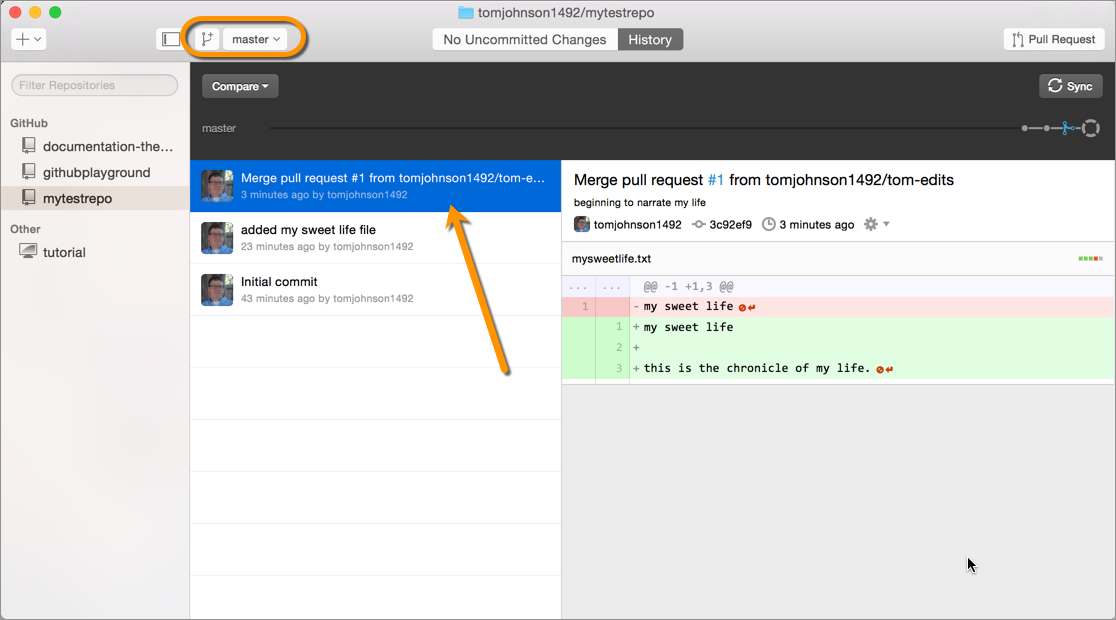
In your Github Desktop client, select the master branch, and then click the Sync button.
The Sync button pulls the latest changes from the master and updates your working copy to it. You will see the pull request merged. It shows you the lines that have been added in the files.
Managing conflicts
Suppose you make a change on your local copy of a file in the repository, and someone else changes the same file in conflicting ways and commits it to the repository first. What happens?
When you sync with the repository, you'll see a message prompting you to either discard your changes or to commit them before syncing.
"Syncing would overwrite your uncommitted changes. Please commit or discard your changes and try again."
If you decide to commit your changes, you'll see a message that says,
"Please resolve all conflicted files, commit, and then try syncing again."
From the command line, if you run git status, it will tell you which files have conflicts. If you open the file with the conflicts, you'll see markers showing you the conflicts. It will look something like this:
<<<<<<<HEAD
I love carrots.
I love bananas.
origin/master
In this case, HEAD is your local change. Here you changed the line to "I love carrots." Origin/master shows the change someone else made and already committed to the master: "I love bananas."
Fix all the conflicts by adjusting the content between the content markers and then deleting the content markers.
Now you need to re-add the file to git again. To add a specific file:
git add home.md
To re-add all files:
git commit -a
Now make a commit and push it to the origin's master branch:
git commit -m "fixed conflicts"
Your options are the following:
- Run
git pullto merge the other branch into yours, thereby resolving the conflict.