Swagger tutorial
About Swagger
Swagger is one of the most popular specifications for REST APIs for a number of reasons:
- Swagger generates an interactive API console for people to quickly learn about and try the API.
- Swagger generates the client SDK code needed for implementations on various platforms.
- The Swagger file can be auto-generated from code annotations on a lot of different platforms.
- Swagger has a strong community with helpful contributors.
The Swagger spec provides a way to describe your API using a specific JSON or YAML schema that outlines the names, order, and other details of the API.
You can code this Swagger file by hand in a text editor, or you can auto-generate it from annotations in your source code. Different tools can consume the Swagger file to generate the interactive API documentation.
The interactive API documentation generated by the Swagger file is minimal. It shows the resources, parameters, requests, and responses. However, it's not going to provide any other detail about how your API works.
The Swagger Petstore example
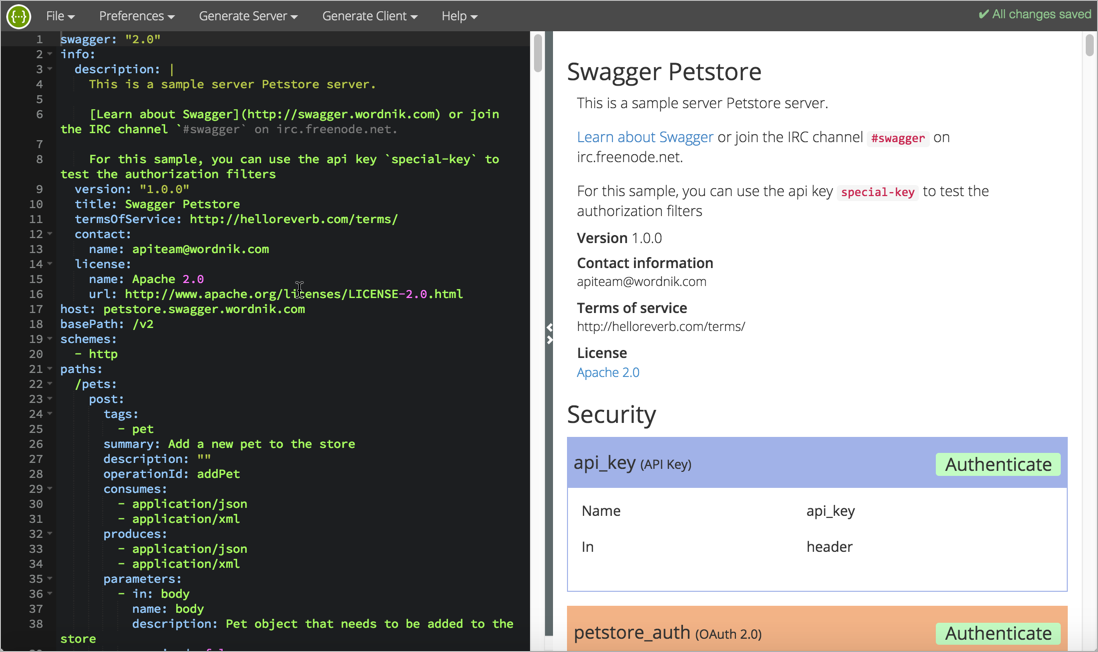
In order to get a better understanding of Swagger, let's explore the Petstore example. Note that this UI is Swagger UI. Swagger can be rendered into different visual displays based on the visual framework you decide to use to parse the Swagger spec.

There are three resources: pet, store, and user.
Create a pet
- In the Pet resource, expand the Post method.
Click the yellow JSON in the Model Schema section:
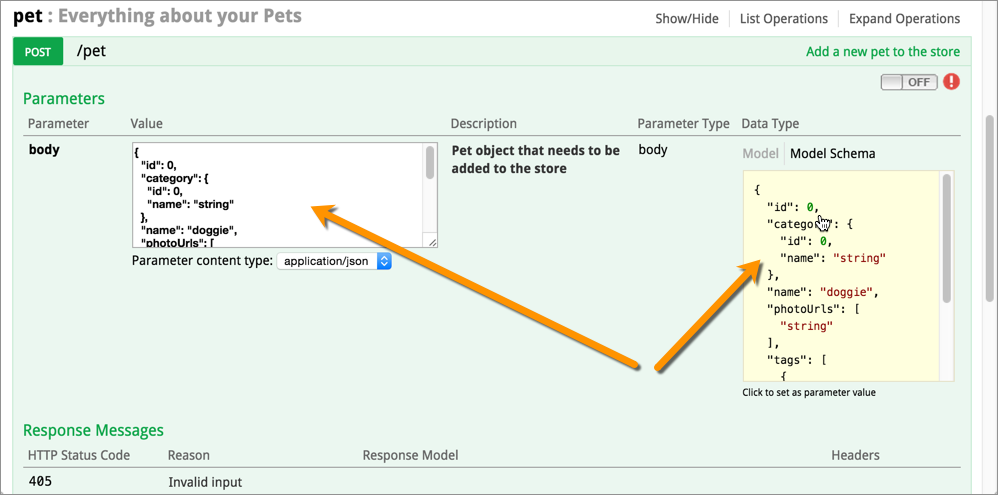
This populates the body value with the JSON. This is the JSON you must submit in order to create a pet.
Change the value for the first
idtag. (Make it really unique so that others don't use the sameid, and don't start with0.)Change
namevalue to something unique. Here's an example:{ "id": 37987, "category": { "id": 0, "name": "string" }, "name": "Mr. Fluffernutter", "photoUrls": [ "string" ], "tags": [ { "id": 0, "name": "string" } ], "status": "available" }Click the Try it out! button.
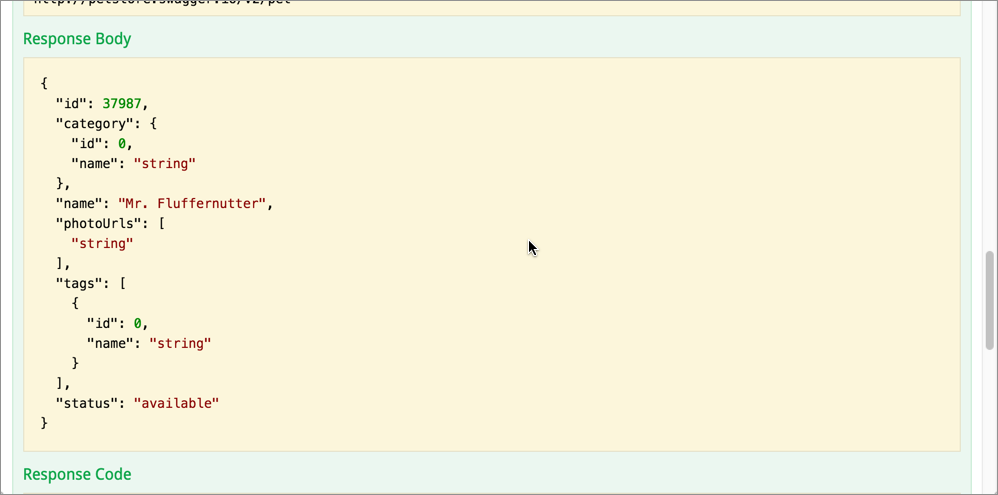
Look and see the response.
Find your pet by the ID
- Expand the GET
pet/{petId}method. - Insert your pet's ID in the
petIdvalue box. Click Try it out!
The pet you created is returned in the response.
By default, the response will be in XML. Change the Response Content Type selector to application/json and click Try it out! again.
The pet response is returned in JSON format.
The emphasis in Swagger documentation is to learn by doing. You make real requests and see responses to better understand how the Petstore API really works. However, note also that now you have created a new pet in your actual Petstore database. This test data may be something you have to wipe clean when you transition from exploring and learning about the API to actually using the API for production use.
Sorting out the Swagger components
Swagger has a number of different pieces:
Swagger spec: The Swagger spec is the official schema about name and element nesting, order, and so on. If you plan on hand-coding the Swagger files, you'll need to be extremely familiar with the Swagger spec.
Swagger editor: The Swagger Editor is an online editor that validates your YML-formatted content against the rules of the Swagger spec. YML is a syntax that depends on spaces and nesting. You'll need to be familiar with YML syntax and the rules of the Swagger spec to be successful here. The Swagger editor will flag errors and give you formatting tips. (Note that the Swagger spec file can be in either JSON or YAML format.)
Swagger-UI: The Swagger UI is an HTML/CSS/JS framework that parses a JSON or YML file that follows the Swagger spec and generates a navigable UI of the documentation. This is the tool that transforms your spec into the Swagger Petstore-like UI output.
Swagger-codegen: This utility generates client SDK code for a lot of different platforms (such as Java, JavaScript, Scala, Python, PHP, Ruby, Scala, and more). This client code helps developers integrate your API on a specific platform and provides for more robust implementations that might include more scaling, threading, and other necessary code. An SDK is supportive tooling that helps developers use the REST API.
Some sample Swagger implementations
Before we get into this tutorial, check out a few Swagger implementations:
Most of them look pretty much the same, with minimal branding. You'll notice the documentation is short and sweet in a Swagger implementation. This is because the Swagger display is meant to be an interactive experience where you can try out calls and see responses — using your own API key to see your own data. It's the learn-by-doing-and-seeing-it approach.
Note a few limitations with the Swagger approach:
- There's not much room to describe in detail the workings of the endpoint.
- The Swagger UI looks mostly the same for each output.
- The Swagger UI will be a separate site from your other documentation.
Create a Swagger UI display
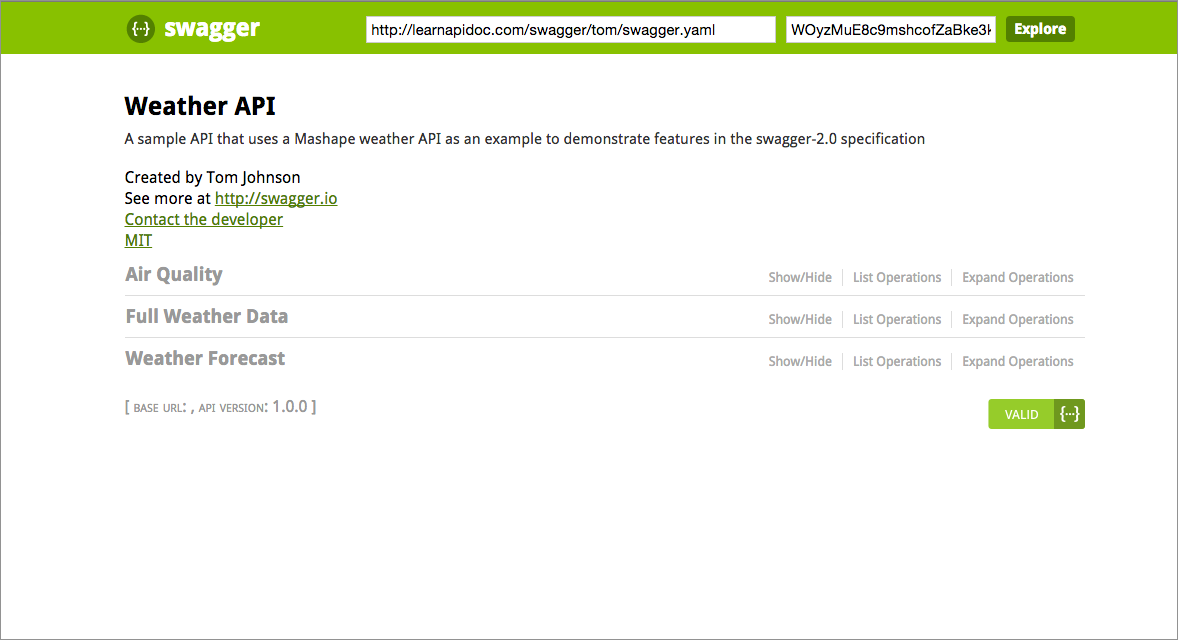
In this activity, you'll create a Swagger UI display for the weatherdata endpoint in this Mashape Weather API. (If you're jumping around in the documentation, this is a simple API that we used in earlier parts of the course.) You can see a demo of what we'll build here:
a. Create a Swagger spec file
To create a Swagger spec file:
- Go to the Swagger online editor.
Select File > Open Example and choose PetStore Simple. Click Open.
You could just customize this sample YML file with the weatherdata endpoint documentation. However, if you're new to Swagger it will take you some time to learn the spec. For the sake of convenience, just go to the following file, and then copy and paste its code into the Swagger editor: swagger.yaml.
Here's what the Swagger YAML file looks like:
swagger: "2.0"
info:
 version: "1.0.0"
 # Weather API"
 description: "A sample API that uses a Mashape weather API as an example to demonstrate features in the swagger-2.0 specification"
 termsOfService: "http://helloreverb.com/terms/"
 contact:
   name: "Tom Johnson"
   email: "tomjohnson1492@gmail.com"
   url: "http://swagger.io"
 license:
   name: "MIT"
   url: "http://opensource.org/licenses/MIT"
host: "simple-weather.p.mashape.com"
schemes:
 - "https"
consumes:
 - "application/json"
produces:
 - "application/text"
paths:
 /aqi:
   get:
     tags:
       - "Air Quality"
     description: "gets air quality index"
     operationId: "getAqi"
     produces:
       - "text"
     parameters:
       -
         name: "lat"
         in: "query"
         description: "latitude"
         required: false
         type: "string"
       -
         name: "lng"
         in: "query"
         description: "longitude"
         required: false
         type: "string"
     responses:
       200:
         description: "aqi response"
       default:
         description: "unexpected error"

 /weather:
   get:
     tags:
       - "Weather Forecast"
     description: "gets weather forecast in short label"
     operationId: "getWeather"
     produces:
       - "text"
     parameters:
       -
         name: "lat"
         in: "query"
         description: "latitude"
         required: false
         type: "string"
       -
         name: "lng"
         in: "query"
         description: "longitude"
         required: false
         type: "string"
     responses:
       200:
         description: "weather response"
       default:
         description: "unexpected error"
 /weatherdata:
   get:
     tags:
       - "Full Weather Data"
     description: "Get weather forecast by Latitude and Longitude"
     operationId: "getWeatherData"
     produces:
       - "application/json"
     parameters:
       -
         name: "lat"
         in: "query"
         description: "latitude"
         required: false
         type: "string"
       -
         name: "lng"
         in: "query"
         description: "longitude"
         required: false
         type: "string"
     responses:
       200:
         description: "weatherdata response"
       default:
         description: "unexpected error"

securityDefinitions:
  internalApiKey:
    type: apiKey
    in: header
    name: X-Mashape-Key
Notice that this is YML instead of JSON. YML syntax is a more human-readable form of JSON. With YML, spacing matters. New levels are set with two indented spaces. The colon indicates an object. Hyphens represent a sequence or list (like an array). If you download this file instead of copy-and-pasting it above, you're less likely to run into spacing errors.
The Swagger editor shows you how the file will look in the output. You'll also be able to see if there are any validity errors. Without this online editor, you would only know that the YML syntax is valid when you run the code (and see errors indicating that the YAML file couldn't be parsed).
Make sure the YAML file is valid in the Swagger editor. If there are any errors, fix them.
- Go to File > Download YAML and save the file as "swagger.yaml" on your computer. (You could also just copy the code and insert it into a blank file and call it swagger.yaml.)
You can also choose JSON as the format, but YAML is more readable and works just as well.
b. Set Up the Swagger UI
Go to the Swagger UI Github project. Click the Download ZIP button. Download the files to a convenient location on your computer and extract the files.
The only folder you'll be working with here is the dist folder. Everything else is used only if you're regenerating the files, which is beyond the scope of this tutorial.
Drag the dist folder out of the swagger-ui-master folder so that it stands alone. Then delete the swagger-ui-master folder.
- Inside your dist folder, open index.html in a text editor.
Look for the following code:
url = "http://petstore.swagger.io/v2/swagger.json";- Change the
urlvalue fromhttp://petstore.swagger.io/v2/swagger.jsonto the following:"swagger.yaml";. - Drag the swagger.yaml file that you created earlier into the same directory as the index.html file you just edited.
- Save the file.
- To view the file, open it in Firefox. (Chrome may block the local Javascript.)
c. Upload the Files to a Web Host
In addition to viewing the Swagger file locally in Firefox, you can also run a web server locally on your computer through XAMPP:
- Download and install XAMPP.
- After installation, in your Applications folder, open the XAMPP folder and start the '''manager-osx''' console.
- Click the Manage Servers tab in the console manager.
- Select Apache Web Server and click Start.
- Open the htdocs folder where XAMPP was installed. On a Mac, the location is usually in
/Applications/XAMPP/xamppfiles/htdocs. - Drag the dist folder into this space.
- In your browser, go to localhost/dist.
The Swagger UI display should appear.
Interact with the Swagger UI
- Go to the URL where you uploaded your Swagger files. Alternatively, if you're using XAMPP locally, go to localhost/dist.
- In the upper-right corner, click Authorize and enter your Mashape API key. If you don't have a Mashape API key, you can use EF3g83pKnzmshgoksF83V6JB6QyTp1cGrrdjsnczTkkYgYrp8p.
- Go to Google Maps and search for an address.
- Get the latitude and longitude from the URL, and plug it into your Swagger UI. (For example, 1.3319164 for lat, 103.7231246 for lng.)
Click Try it out.
If successful, you should see something in the response body like this:
9 c, Mostly Cloudy at South West, SingaporeIf you see a response that says "Not supported," try the lat and lng coordinates used here.
Try working with each of your endpoints and see the data that gets returned.
Note that if you refresh the page, you'll need to re-enter your API key.
Auto-generating the Swagger file from code annotations
Instead of coding the Swagger file by hand, you can also auto-generate it from annotations in your programming code. There are many Swagger libraries for integrating with different code bases. These Swagger libraries then parse the annotations that developers add and generate the same Swagger file that you produced manually using the earlier steps.
By integrating Swagger into the code, you allow developers to easily write documentation, make sure new features are always documented, and keep the documentation more current. Here's a tutorial on annotating code with Swagger for Scalatra. The annotation methods for Swagger doc blocks vary based on the programming language.
For other tools and libraries, see Swagger services and tools.